How To Guides for the Vaio F Series: |
Clean Install using the
OEM Recovery Discs |
Calibrate the Monitor |
Replace the Display
and/or the Inverter |
Replace The
Keyboard or Clean the Fan |
Add a
Secondary Hard Drive |
Replace the Main Hard
Drive | VAIO
F Series Disassembly Guide - Teardown |
3rd Party
Battery: $70/4 hours Battery Life!
![]()
Vaio F Series - How To Replace the Keyboard & Clean the Fan
|
Linking to this page: if you can, please use keywords in your links to help search engines results & use the normal URL found in the status bar of your browsers. Exception: forum.notebookreview.com (NBR) broke all links to the How-To articles hosted on this site by breaking all links starting with monteverde.org. If you want to link to this page on NBR, copy, paste & post this as a workaround: [URL="http://tinyurl.com/3xuf23c"]Vaio_F Series - How To Replace the Keyboard & Clean the Fan[/URL] Note: if you don't put an underscore between comercial words like Vaio F or F Series or Acer, etc, then NBR automatically parse the words with links to their coupons pages & break the intended links. Hence the Vaio_F. I can't do individual support (except for longtime F
owners friends) but if
you want to write to make suggestions or comments about this page or
just say Hello or thanks, please write to:
All the Vaio F content found here is in the process of being moved to this new dedicated mini-site: www.vaiofseries.com |
It's easy to replace the keyboard on a VAIO F Series notebook. It takes about 30 minutes.
Thank you to Byron for his assistance.

Tools: magnetized small #0 Phillips screwdriver (crosshead). Magnetized because it's much easier to extract from deep holes & reset the small screws w/o dropping them. Otherwise you will have to flip over the laptop & catch the screws.
Warnings:
- Never touch a circuit or electrical contacts with the magnetized screwdriver's
point.
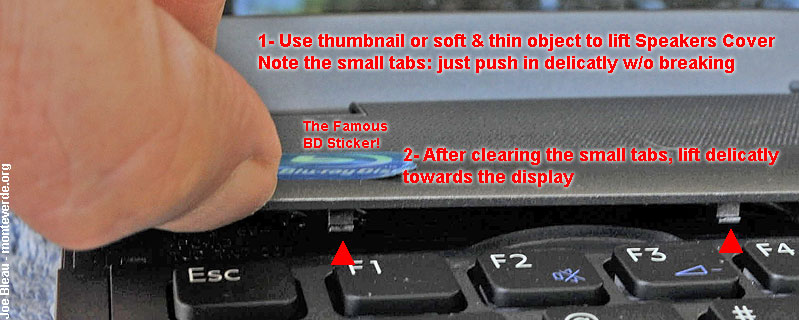
- There are several tabs & hooks on the speakers cover & the keyboard
that mate with the rest of the VPCF's body. When
unsnapping them if you use force instead of patience & break some of these tabs,
the parts may not fit flush or secured after re-assembly.
- The exposed speakers are very easy to nick or destroy. I suggest covering them
with a piece of cardboard or small plastic lid covers.
- Sort removed screws by steps as there are 2 different length, use paper note if
you have a short span memory. The 2 short chromed ones go in the battery bay.
- As they say in USA: this coffee is hot and the floor is slippery and don't sue
us if you try this DIY & mess up something in your notebook as you were warned:
use this how-to guide @ your own risk.

- Don't work over a shaggy rug as you may have to search for that tiny screw you
dropped.
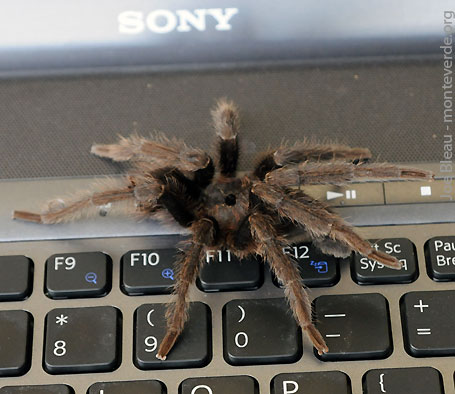
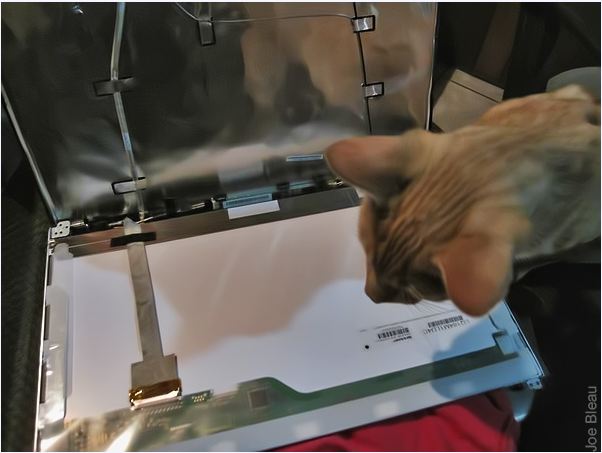
- Get your curious pets out of the room. Curious kids are fun. :)
1- Clean working surface covered with a towel or clean rag to avoid scratching
the Precious and help catching the dropped screws.
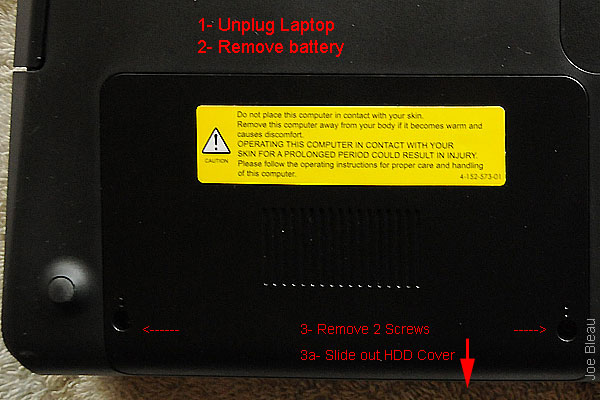
2- Unplug the F Series notebook, remove the battery and then press the main
power button for at least 5 seconds to drain the residual power.
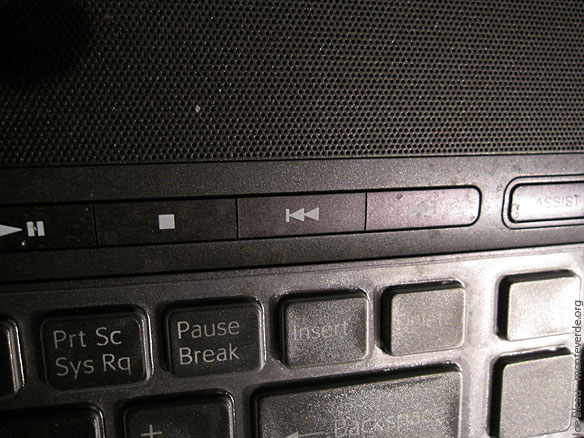
3- Remove the speakers cover to gain access to the keyboard's top tabs.
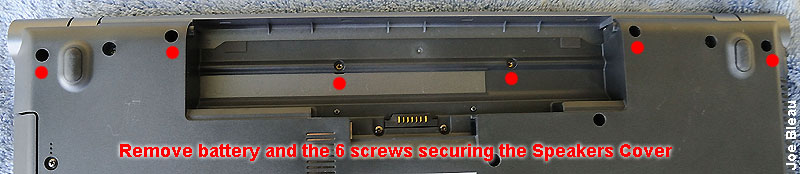
Note: the speakers are now exposed, be careful as they are easy to nick or damage!
4- Remove the 2 screws fastening the keyboard.
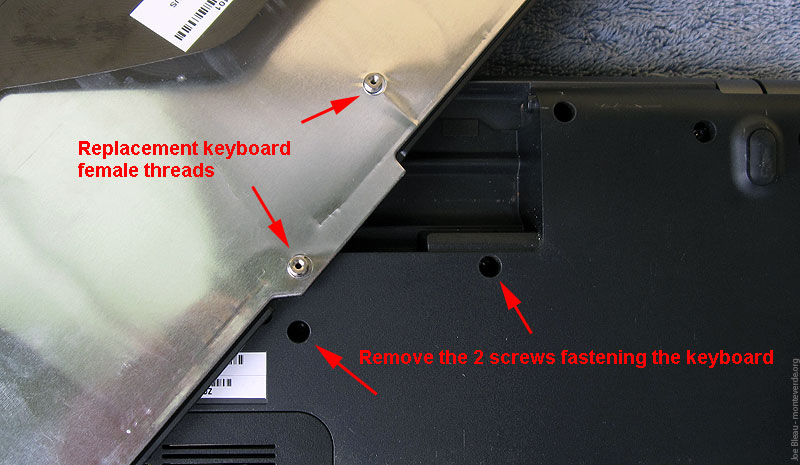
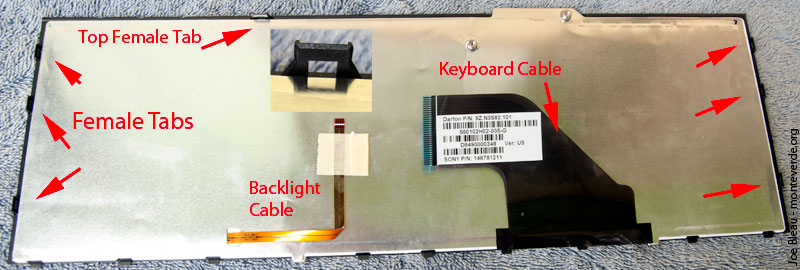
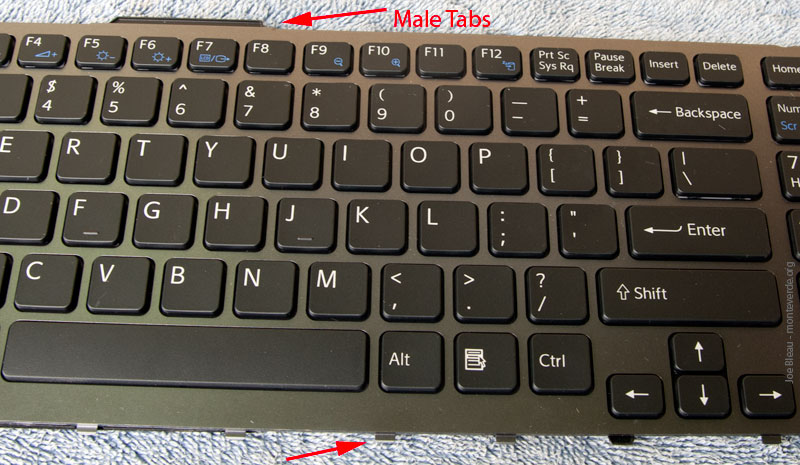
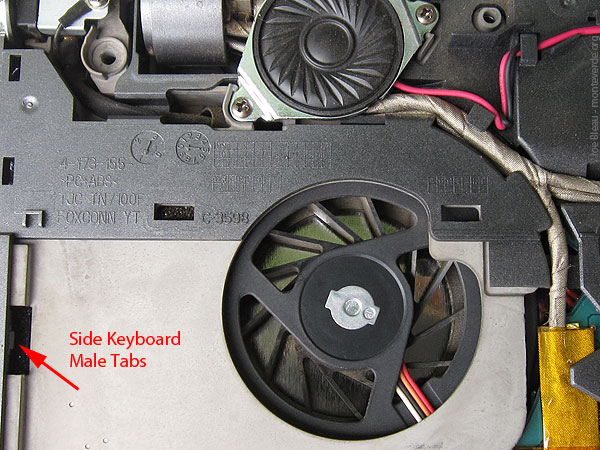
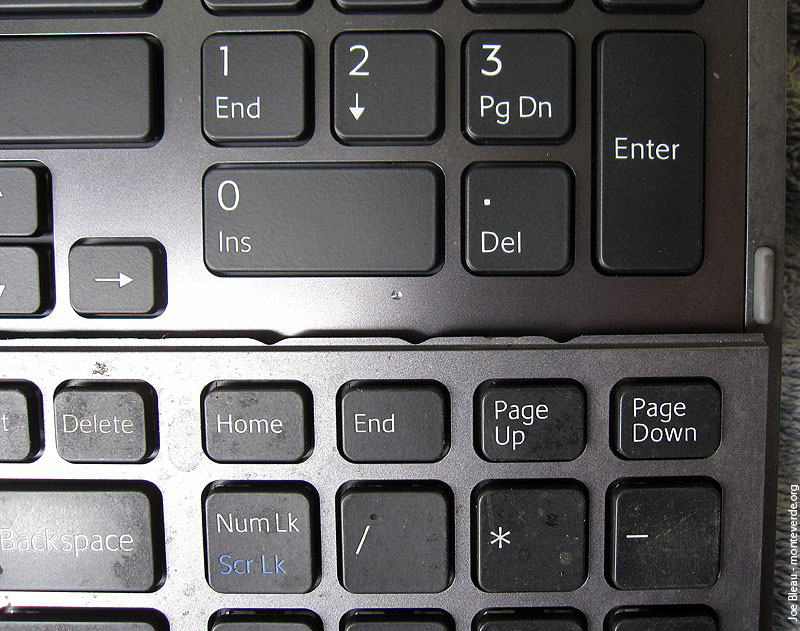
5- Study the replacement keyboard. You will notice top & bottom male tabs that go under the speakers cover and under the palm rest.
Just under the Insert key there is 1 female top tab that you need to pay special attention to. On both sides there is 3 female tabs & all are mating with opposing male tabs on the F Series' body.
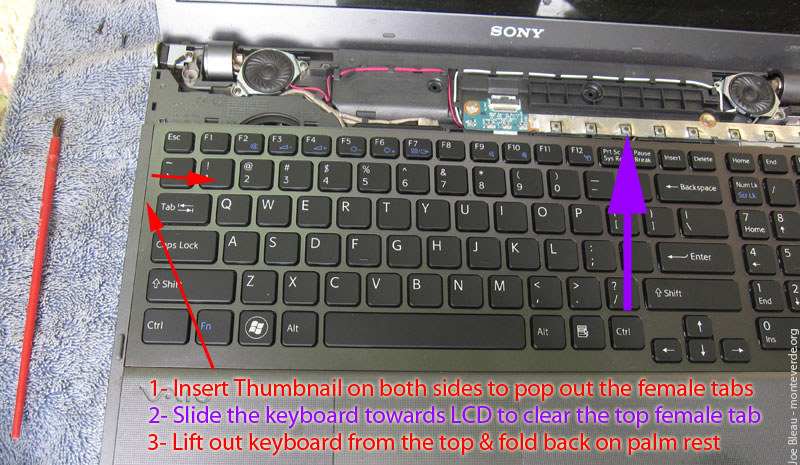
6- This is important: first pop out the sides female tabs then slide the keyboard up to clear the top female tab that is under the Insert key. The male tabs are not important for removal but are when installing the new keyboard.

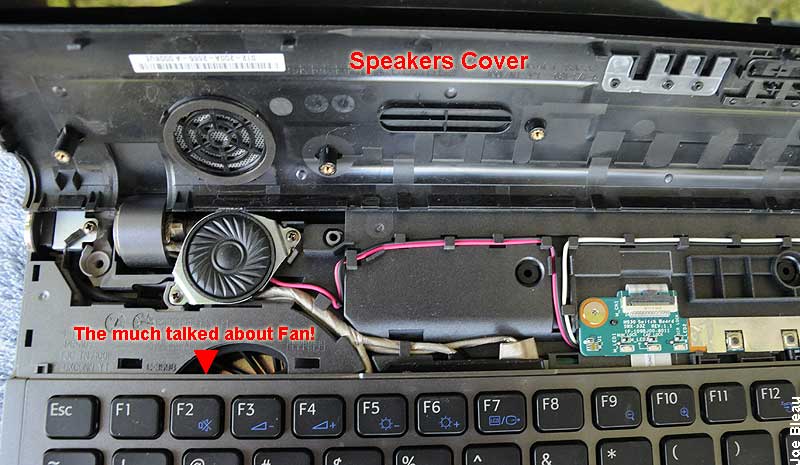
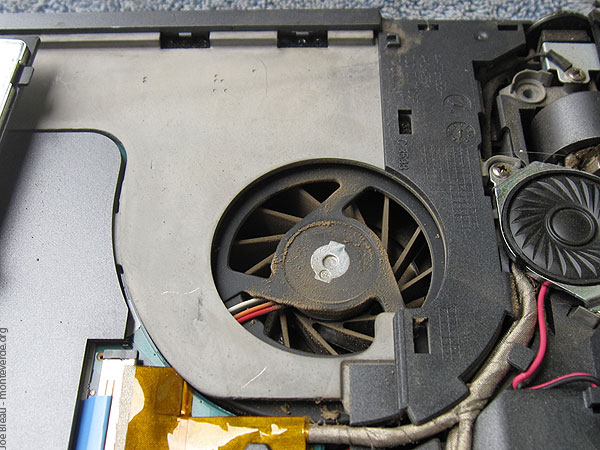
7- Now you have access to the fan, a good opportunity to clean it. It's crazy how just a small amount of dust will affect the temperature and fan speed at idle on this model. I used a powerful vacuum cleaner & a small kindergarten red artist brush (as seen above) to "unglue" the dust. If you completely block the side exhaust vent with your hand, the vacuum will be more efficient & suck some dust from the intake of the fan. Don't vacuum your speakers unless you want to destroy them! You can also use compressed air from outside the laptop's vent towards the fan and viceversa but I would no do that indoors. Before & after:
8- Don't disconnect the keyboard yet, study the way the cables are folded and connected. Take some photos if necessary. The cables will need to be folded the same way as the old keyboard otherwise there will be some 'flex' when typing because of the cables being bunched-up.
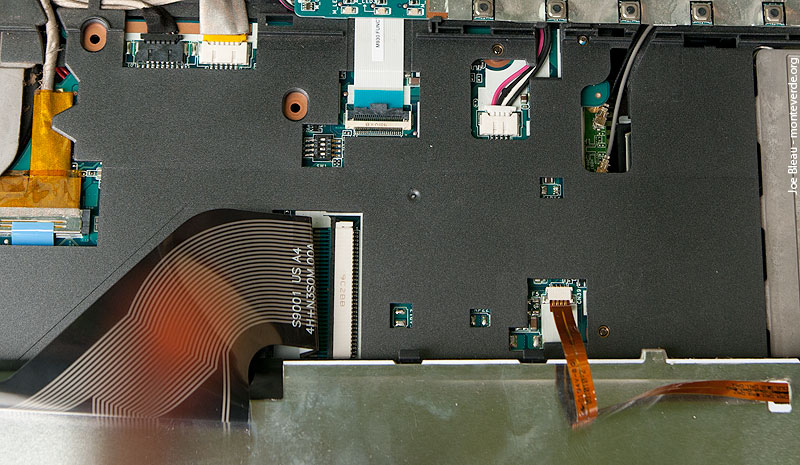
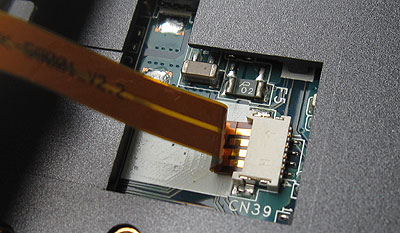
9- If you are replacing a backlit keyboard, just disconnect the backlight cable by pulling it out. If installing a backlit keyboard, fold the cable as shown below & above.
10- Push out the black lock securing in place the main ribbon keyboard cable then pull out the cable. It's not necessary to remove the lock completely but I found it easier for inserting the new cable & simply snap back the lock on top of the cable after inserting it. Note the hooks as shown in the insert so push out sideways to remove it completely.
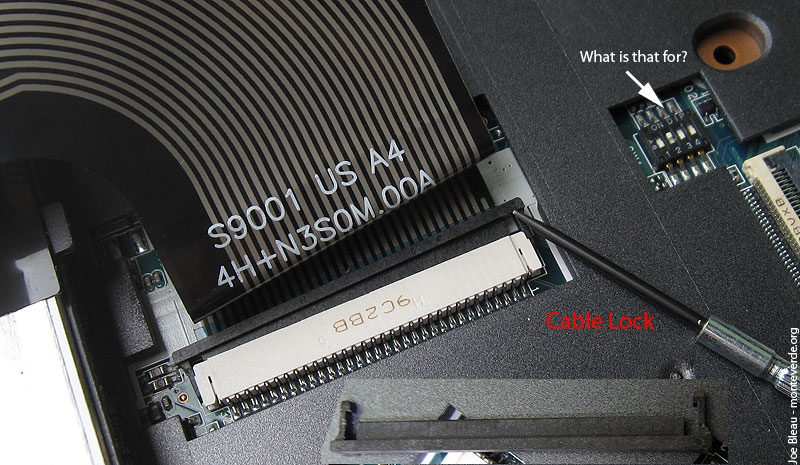
11- Align the new keyboard cable next to the old one & fold the cable the same way. Use the letters on the sticker as a guide. This is necessary because the fold will go in a depression so not to mess up with the keyboard's bottom.
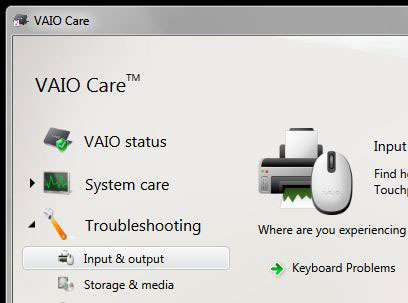
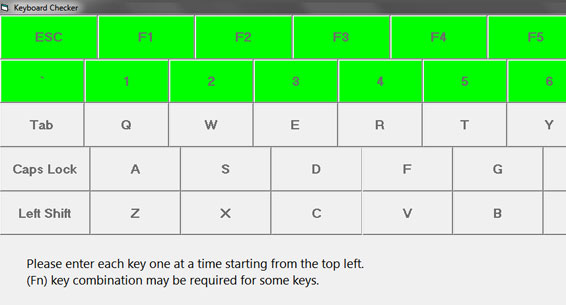
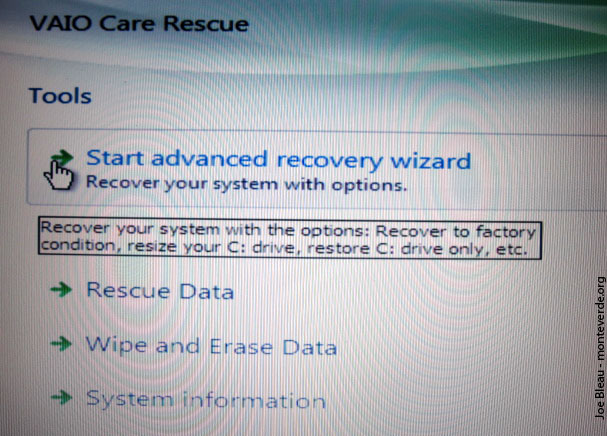
12- Install the new keyboard by reversing the steps, make sure the ribbon folds in it's bay. Before reversing steps 4, 3, 2 & 1, boot the laptop & make sure the keyboard is working properly using Notepad or whatever. A very good keyboard test is found in: ASSIST > Vaio Care > Troubleshooting > Input & Output > Keyboard Problems:
Activate the backlight with S1 > Vaio Control Center > Keyboard > Backlit KB & cover the light sensor above F9 with something. Don't worry if there is some minor flex as the speakers cover will fasten the top of the keyboard. Make sure to push in the male tabs under the palm rest to minimize the gap around the keyboard.

The sensor is the round dot just above the leg on the left.
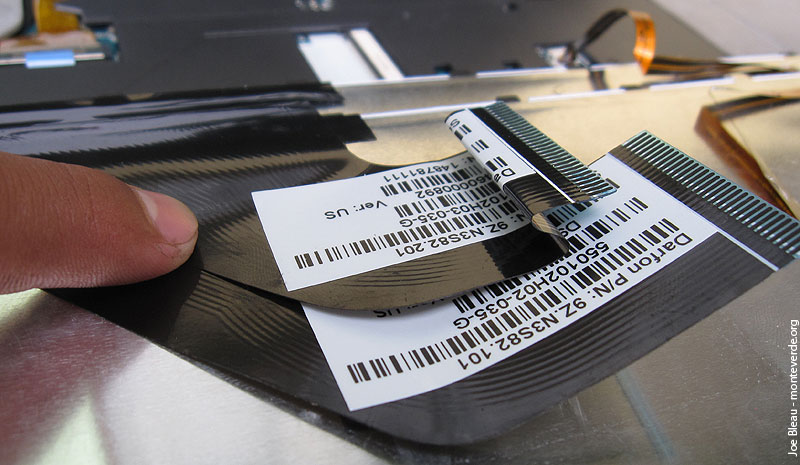
While my $25 Fleabay keyboard fits & works perfectly, the frame's color is different compared to the OEM which is more silver & less gunmetal. Maybe it's a different batch of paint, maybe it's 7 months of exposure to ultraviolet, weather etc.
Or maybe it's because the old keyboard says SONY P/N: 148781111 - Darfon P/N: 9Z.N3S82.201 while the replacement says SONY P/N: 148781211 - Darfon P/N: 9Z.N3S82.101. Dunno, don't care.
-----------------------------------------------
I got the Vaio F Series US Backlit Replacement Keyboard model #
VPC-F11M1EH for $35 including shipping worldwide on Fleabay. It fits
both the VPC-F11 and the VPC-F12. Run this search for the keyboard part
number & include title & description:
VPC-F11M1EH. Mine was from the reseller
chinagemwon (Positive
Feedback: 99.3%). It's a OEM_Sony & took 3 weeks to reach the cloud
forest on the top of a mountain range where I live in Costa Rica.

I also bought a $5.85 Vaio F keyboard silicone skin (price includes shipping worldwide). More details tomorrow.
I will add some links & comments tomorrow including how to set the keyboard language.
Hope this helps!
- Joe Bleau
----------------------------------------------------------------------------------------------------------------
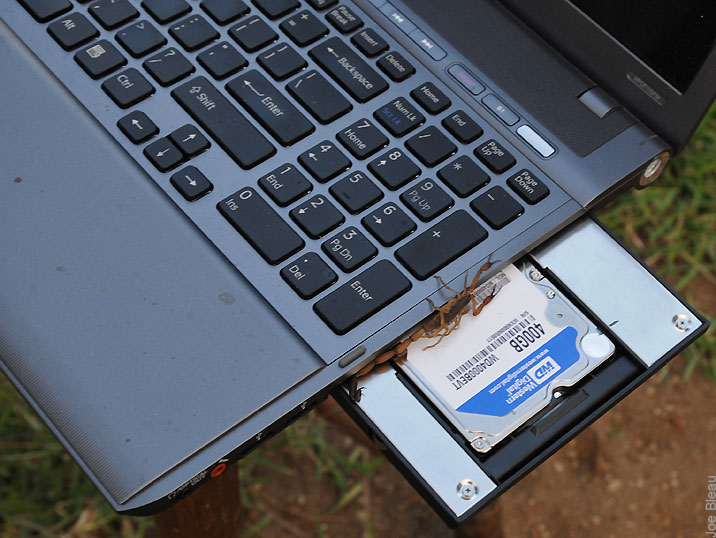
How to install a secondary hard drive in the optical drive bay of a VAIO VPCF Series
------------------------------------------------------------------------------------------------------
How to Replace the Hard Drive (HDD) of a VAIO VPCF Series Laptop
--------------------------------------------------------------------------------------------
Vaio F Series Laptop How To Replace the LCD Display & Inverter
-----------------------------------------------------------------------------------------------------
Vaio F Series Monitor Calibration and Users Created Profiles Roundup

-----------------------------------------------------------------------------------------------------
Vaio F Series Windows 7 64-bit Clean Install Guide Using OEM Recovery Discs
------------------------------
How To Guides for the Vaio F Series: |
Clean Install using the
OEM Recovery Discs |
Calibrate the Monitor |
Replace the Display
and/or the Inverter |
Replace The
Keyboard or Clean the Fan |
Add a
Secondary Hard Drive |
Replace the Main Hard
Drive | VAIO
F Series Disassembly Guide - Teardown |
3rd Party
Battery: $70/4 hours Battery Life!
![]()
You can contribute to the VaioFSeries.com mini-site I'm currently building by clicking
Joe Bleau's avatars:
![]()
![]()
![]()
![]()
![]()
![]()
![]()
![]()
![]()